Recently, a friend and her husband were featured on the HGTV Show "House Hunters". When the episode aired, Liz and Mike had some throw pillows on their bed that I fell in love with. While watching, I told my husband, "We've got to get some of those pillows."
Only, when I started searching different sites, I found that most of them cost $60 or more.
And while I absolutely loved these ones by The Virginia House...

I'm cheap and we're on a grad school budget.
So, I started searching Pinterest for ideas on how to create my own.
I started by creating a stencil using the computer and card stock printing paper. Follow along if you want the instructions. If not, skip to the part where I stencil the letters.
Creating the Stencil
1. Start by choosing a font and by adjusting the letter sizes to how big or small you would like them.

2. Next, left click with the mouse and choose "font" on the drop down box.

3. Once the font box has opened, look for the "text effects" option towards the bottom and choose it.

4. Now you can choose "text outline" and "solid line",
(this should give you a solid black outline around your text).

5. And finally, change the font color to white (or a color that is lighter than the black outline).
*There may be an easier and more common sense way to do all of this but humor me...this was the best I could come up with.


6. Print the outline letter and get your box cutter ready.
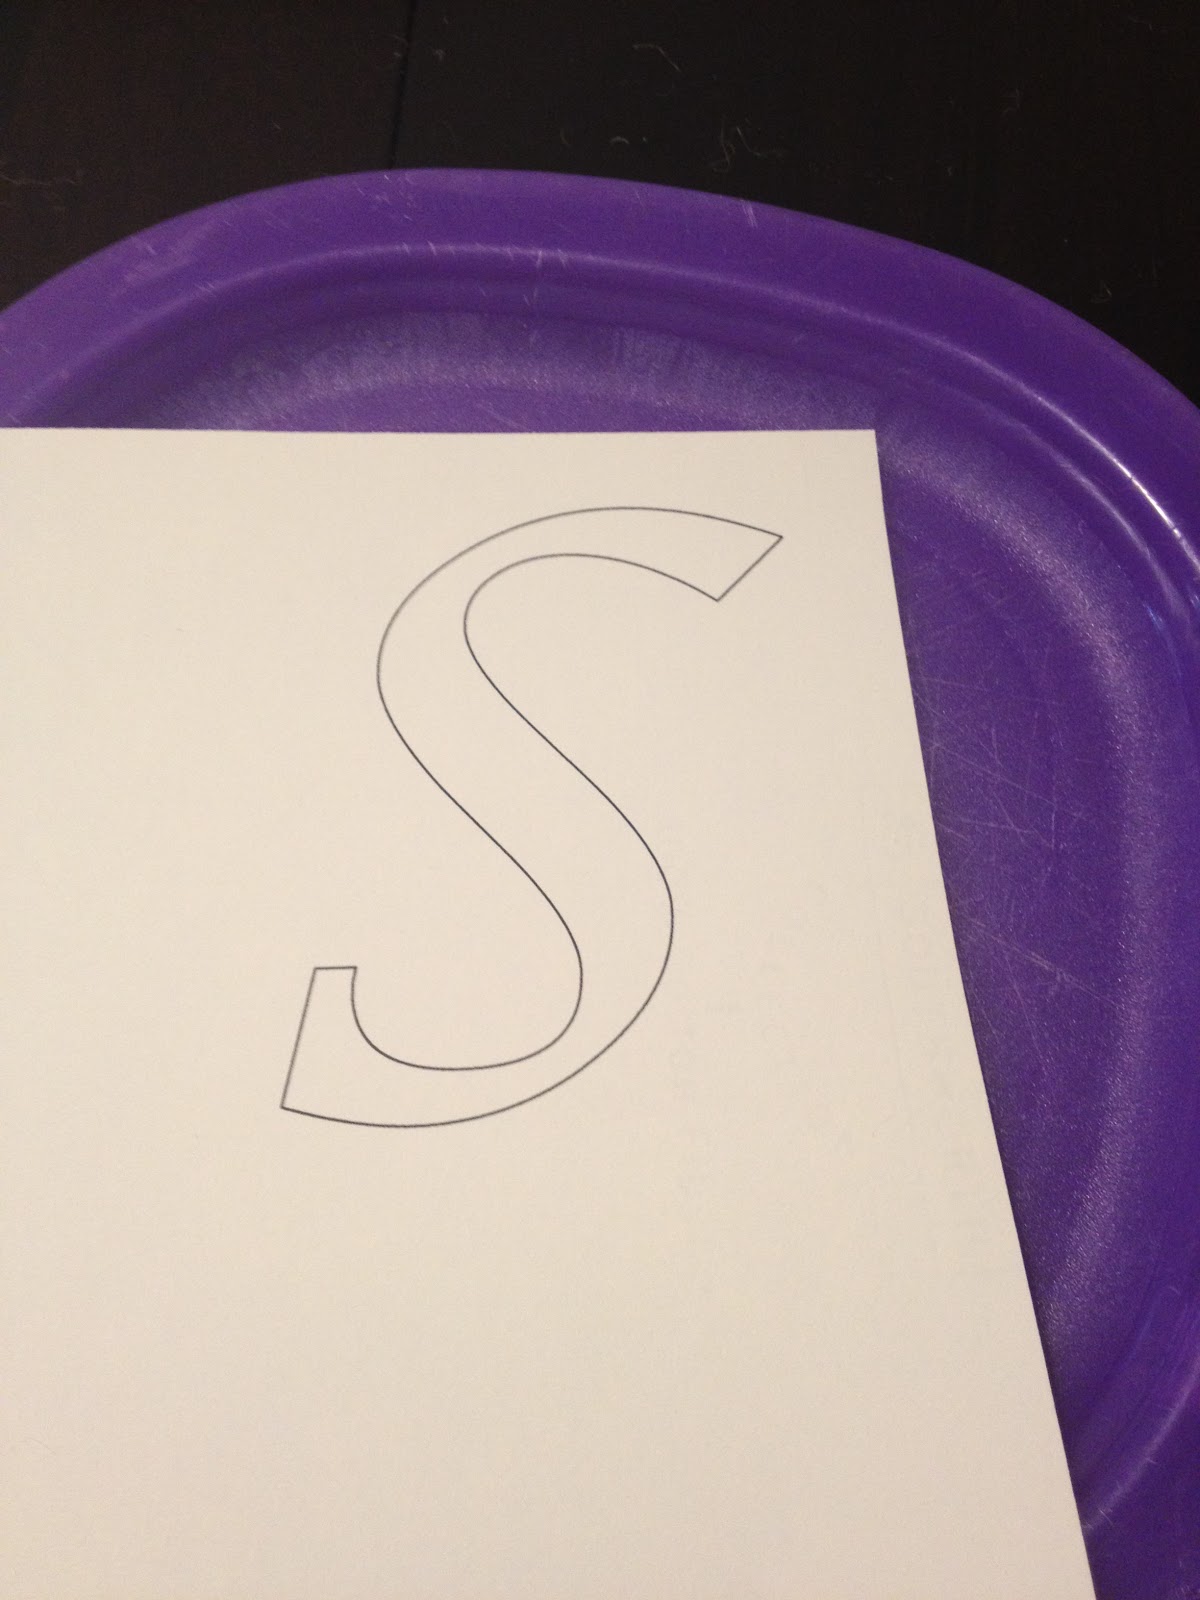
7. I chose a box cutter rather than scissors and I'm so glad I did. Make sure you angle the cutter down instead of straight up as your are tracing the letter. If you miss using the blade, it won't actually cut the paper in all spots and you'll have to redo parts of the tracing.


8. Now you are officially done with the stenciling and you are ready to trace your letters onto the burlap.

As I wrote in my Burlap Wreath Post, burlap is very inexpensive and can sometimes be bought from craft stores for as low as $1.99 a yard. You can't beat that. I bought one yard of fabric and cut it in half to cover both my throw pillows.
I'm almost embarrassed to say how easy this whole project ended up being. I actually chose to stencil my letters with a metallic gold Sharpie Marker. I could have used paint but I figured with a toddler running through my house, I just risked being knocked into and spilling paint everywhere.

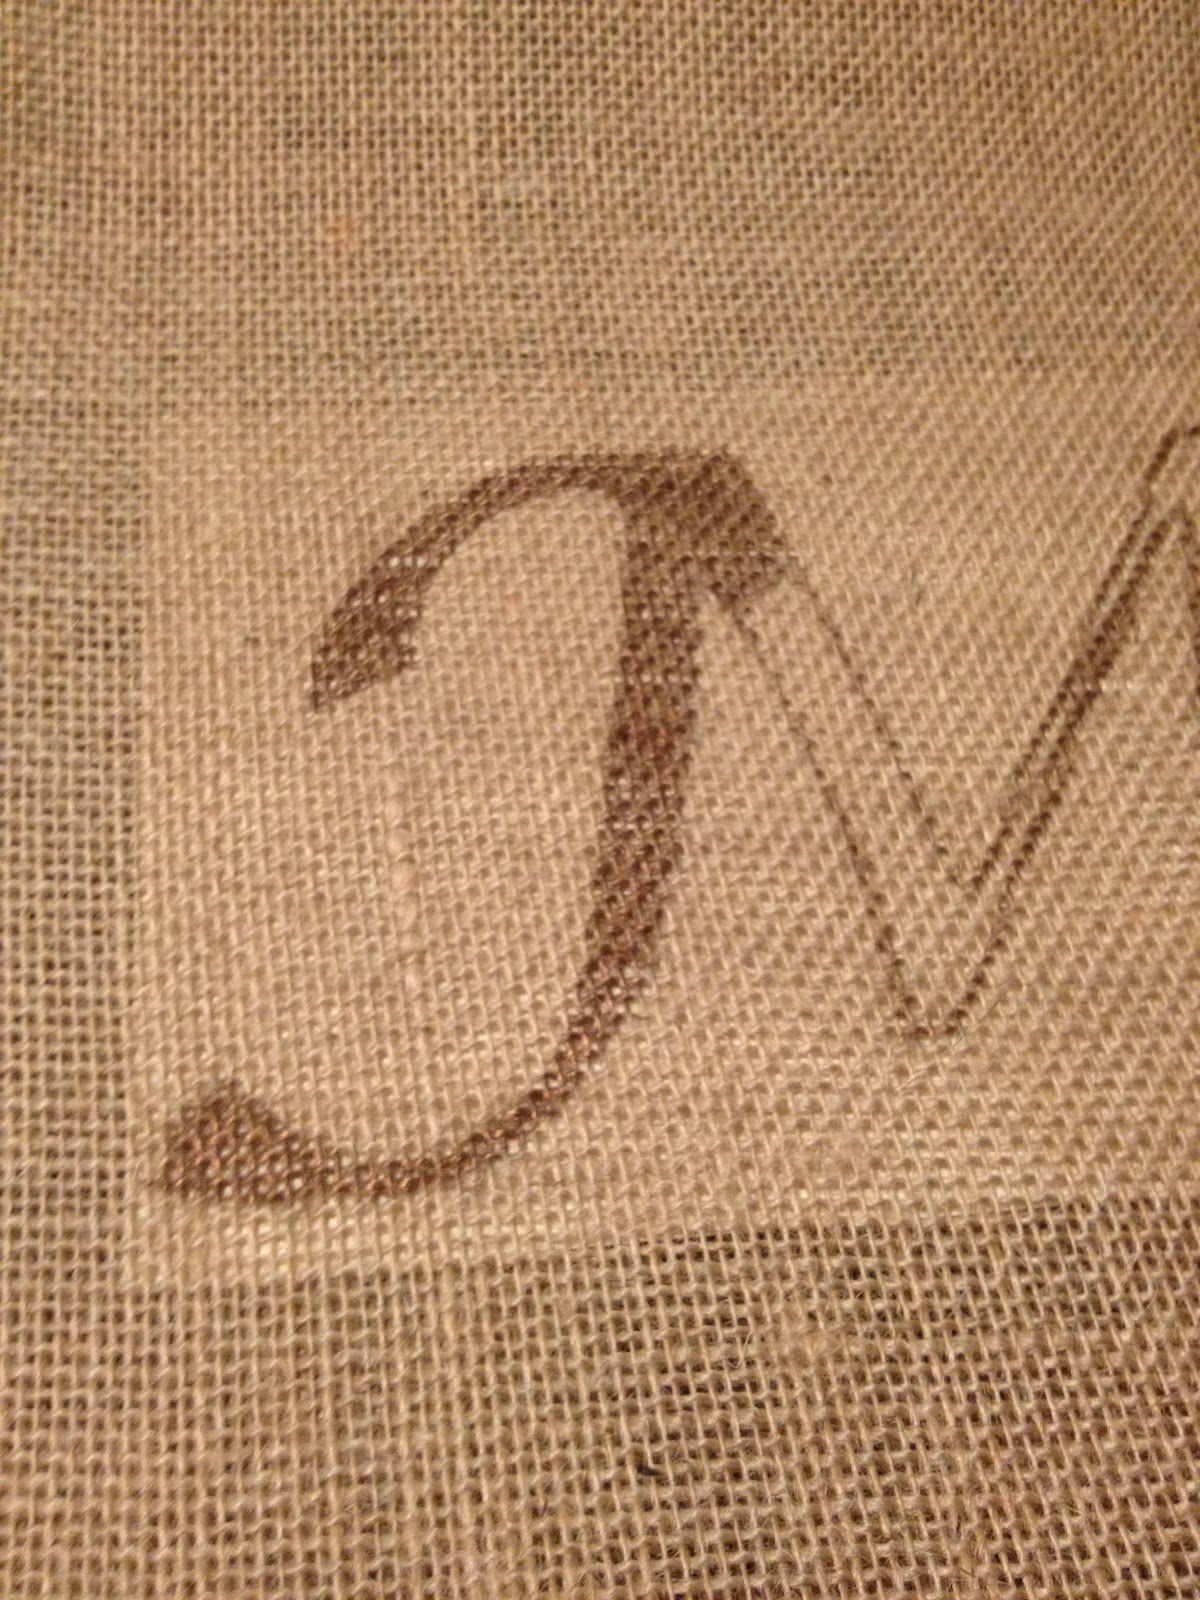
And finally, once the letters were touched up, I hand sewed the burlap onto my old throw pillows. The sewing took a little bit of time but I wasn't sure if I could use a sewing machine on burlap.
You can find a simple tutorial here on how to recover pillows. It really is as simple as ironing the the hems and sewing the two sides of the pillowcase inside out. When the two sides are sewn, flip the pillowcase to the correct side, stuff your pillow inside the case and sew up the bottom of the pillow.
.JPG)
And finally...

The total cost for this project was under $5.00. Because we already had the throw pillows, the only purchases I made were the burlap and the package of markers.

I'm pretty excited with how these turned out and I may add an "&" sign somewhere down the road to another pillow. Hope I didn't miss anything! I would love to see pictures if you make your own. A special thanks to Liz & Mike for giving me the idea to create some of our own!
Love,


.JPG)